

Have you ever thought about how the Kubernetes scheduler under the hood schedules the Pod on the Node? Imagine you've created a deployment that contains 5 replicas of Pod, how does kube-scheduler determine which node the Pod should be scheduled on? Not only this but what if you require to schedule Pod on a specific Node in a Kubernetes cluster? In this blog, we'll be taking a look on how the Kube scheduler works under the hood, and what algorithm it generally follows with a Hands-on Practical approach.
Tip: Keep Kubernetes Documentation alongside you!
Before we go further, it is recommended to have a basic understanding of the Kubernetes Architecture. If you'd like to learn about Kubernetes Architecture, you can refer to this blog of mine. But you're open to learning it from anywhere.
Imagine you've x number of Pods that you'd like to be scheduled on certain Nodes in the Kubernetes cluster, the scheduler generally performs two things internally.
Filtering: The filtering step finds the set of Nodes where it's feasible to schedule the Pod. In a Pod spec file, you generally define the desired state. Based on the desired state, the scheduler will filter some of the Nodes that will actually be compatible to match that desired state. For eg. Imagine a Pod request for 64Mi of memory, then the scheduler will try to filter out the Nodes from the given set of Nodes that could schedule that Pod. Imagine a Node that has a memory limit of 50 Mi, this means the scheduler would opt out that Node as a suitable candidate to be scheduled on.
Scoring: In the scoring step, the scheduler ranks the remaining nodes to choose the most suitable Pod placement. The scheduler assigns a score to each Node that survived filtering, basing this score on the active scoring rules.
Finally, the kube-scheduler assigns the Pod to the Node with the highest ranking. If there is more than one node with equal scores, the kube-scheduler selects one of these at random. Assume the following scenario:
Node A:
CPU: 4 cores
Memory: 8 GB
Node B:
CPU: 2 cores
Memory: 4 GB
Node C:
CPU: 8 cores
Memory: 16 GB
Now, let's say we have a pod with the following resource requirements:
CPU: 3 cores
Memory: 6 GB
And let's simplify the scoring process by a basic calculation:
Calculate Resource Scores:
Node A: CPU score = 4 - 3 = 1, Memory score = 8 - 6 = 2
Node B: CPU score = 2 - 3 = -1 (negative scores are penalized), Memory score = 4 - 6 = -2
Node C: CPU score = 8 - 3 = 5, Memory score = 16 - 6 = 10
Calculate Overall Score:
Node A: Overall score = CPU score + Memory score = 1 + 2 = 3
Node B: Overall score = CPU score + Memory score = -1 + (-2) = -3
Node C: Overall score = CPU score + Memory score = 5 + 10 = 15
Select the Node with the Highest Score:
- Node C has the highest overall score (15), so the scheduler selects Node C for scheduling the pod.
Let's take a look at different ways how you can schedule a Pod on specific Node/s based on your requirements.
Manual Scheduling
Manual scheduling in Kubernetes refers to the process of explicitly specifying the node on which a particular pod should run. Instead of relying on the Kubernetes scheduler to automatically select a node based on its internal algorithms and node evaluation, manual scheduling allows users to dictate the placement of pods on specific nodes. You can use the
nodeNameproperty inside your Pod manifest to mention the name of the Node you'd like a Pod to be scheduled on.apiVersion: v1 kind: Pod metadata: name: nginx-pod spec: containers: - name: nginx-container image: nginx:latest nodeName: node01You can use
kubectl get nodescommand to list the nodes that are present in your Kubernetes cluster.
In the above image, you can see that the nginx-pod has been scheduled on the
node01(look at the NODE section on runningk get po -o widecommand).Before moving further, Let's take a look at the other way of grouping the Pods based on labels and selectors. Labels are like sticky notes or tags that you can attach to objects like pods, nodes, or services to give them extra information or characteristics. They are just like the key-value pair that you've specified to Pod to differentiate them from each other. For eg.
language: Go,specie: human,favSport: Soccer,color: blueare some examples of labels. Selectors are just a way to select all those Pods with specific labels. A Pod can have multiple labels assigned to it.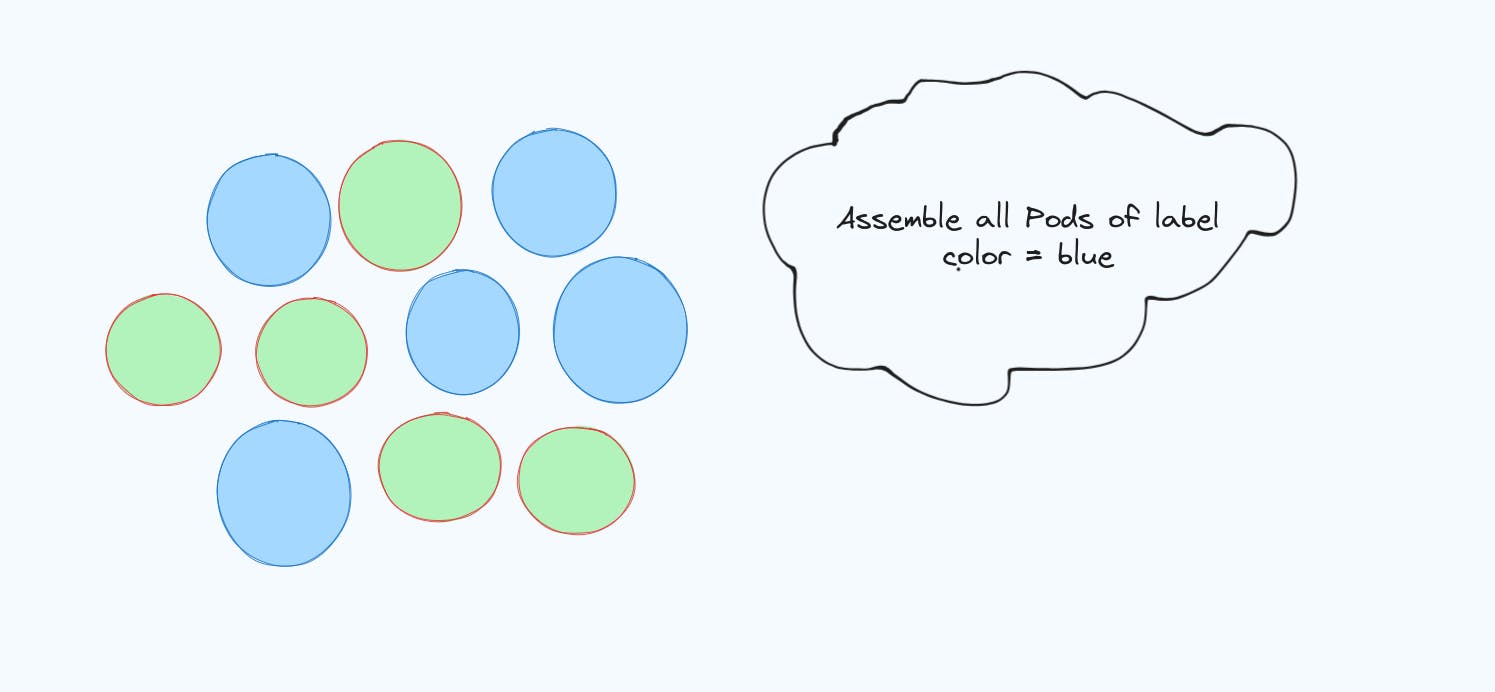
Taints and Tolerations: This is such an interesting way to understand how are Pods scheduled on the Node. Taint is like a spray that you can apply on a certain Node such that only a specific Pod that could tolerate that spray will be able to schedule on that Node. Remember, Taints are applied on Nodes whereas Tolerations are applied on Pods.
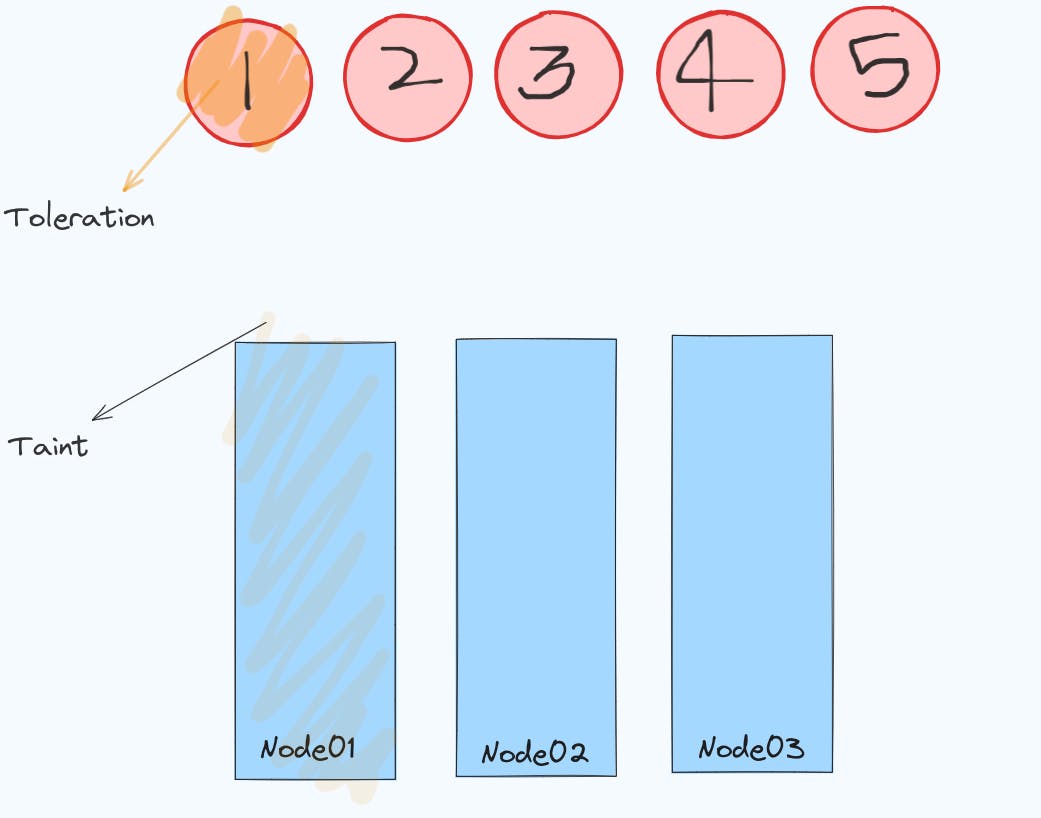
In the above image, there are three nodes - Node01, Node02, and Node03 along with 5 Pods. Node01 has a taint applied to it whereas Pod1 is the only Pod that is tolerant to that Taint. This means that Pod1 can be scheduled on Node01 whereas the rest of Pods can never be scheduled on Node01 because they are intolerant to the taint that Node01 has. It is important to note that Taints and Tolerations don't give a guarantee that the Pod1 will only be scheduled on Node01. There are chances that Pod1 can be scheduled on any of the Node whereas for other Pods, they can be scheduled on every Node except Node01.
Ever wondered why a pod never gets scheduled on the master Node? This is because the master node has a taint already set that prevents other pods from getting scheduled. You can view the taint on the master node by using the command
kubectl describe node <master-node-name> | grep Taints. To taint a node, use the command:kubectl taint nodes node1 key1=value1:NoSchedule.The above command used
effectofNoSchedule. There are various other effects that you can use which have been described below:NoExecute: This taint not only prevents new pods from being scheduled onto a tainted node but also evicts existing pods on that node that do not tolerate the taint. This eviction is what distinguishes "NoExecute" taints from regular taints, which only prevent new pod scheduling.NoSchedule: No new Pods will be scheduled on the tainted node unless they have a matching toleration. Pods currently running on the node are not evicted.PreferNoSchedule: This taint is a "preference" or "soft" version ofNoSchedule. The control plane will try to avoid placing a Pod that does not tolerate the taint on the node, but it is not guaranteed.
In order to specify the toleration for a particular taint inside of a Pod, you can add the following content under the Pod spec file:
      tolerations:
      - key: "example-key"
        operator: "Exists"
        effect: "NoSchedule"
The default value for operator is Equal. A toleration "matches" a taint if the keys are the same and the effects are the same, and:
the
operatorisExists(in which case novalueshould be specified), orthe
operatorisEqualand thevalues are equal
Let's perform a hands-on demo to understand this.
Taint the node01 with a key-value pair as
size=smalland effect asNoSchedule.
Create two Pod manifest files
pod-with-toleration.yamlandpod-no-toleration.yamlwith the following contentpod-no-toleration.yaml
  apiVersion: v1
  kind: Pod
  metadata:
    name: pod-without-toleration
  spec:
    containers:
    - name: nginx-container
      image: nginx
pod-with-toleration.yaml
  apiVersion: v1
  kind: Pod
  metadata:
    name: pod-with-toleration
  spec:
    containers:
    - image: nginx
      name: nginx-container
    tolerations:
    - key: size
      operator: Equal
      value: small
      effect: NoSchedule
Create the Pod and inspect on what node the Pods are scheduled

You can see that the pod-with-toleration Pod was scheduled on node01 because it could tolerate the taint that was applied on node01 whereas the pod-without-toleration Pod was scheduled on controlplane node in which there was no taint applied.
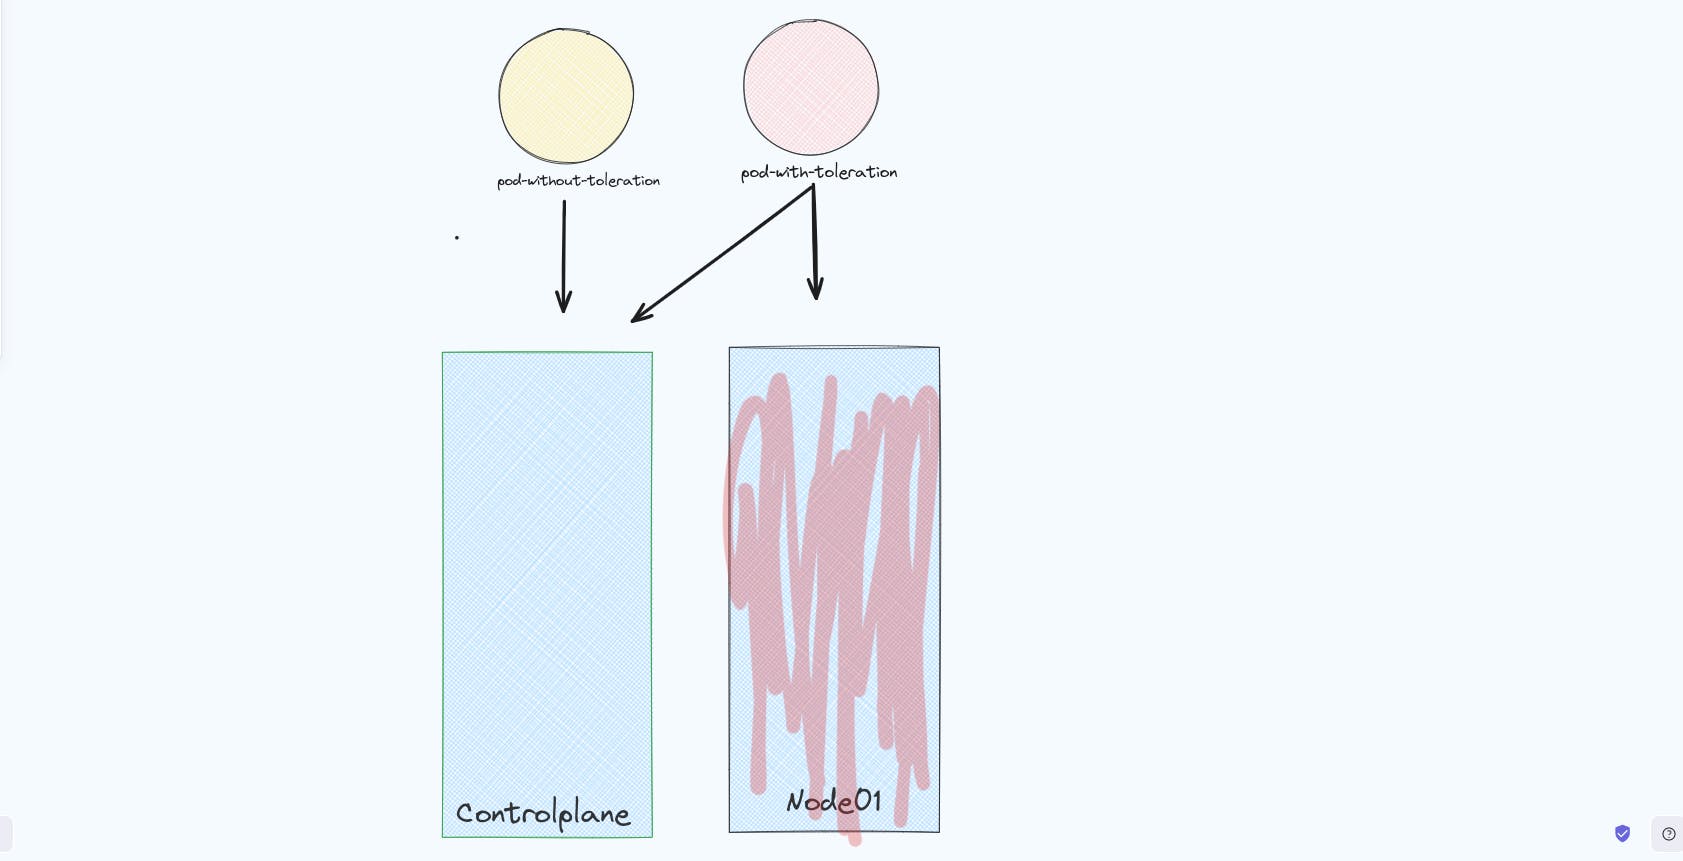
It is important to note that the pod with toleration can be scheduled on either controlplane or Node01 but the Pod without toleration can only be scheduled on controlplane. Hence, Taints and Tolerations don't give you a guarantee that a particular Pod will be scheduled on a particular Node.
Node Selector: The simplest recommended form of node selection constraint is
nodeSelector. You can add thenodeSelectorfield to your Pod specification and specify the node labels you want the target node to have.apiVersion: v1 kind: Pod metadata: name: nginx-pod spec: containers: - name: nginx-container image: nginx nodeSelector: env: prod # assign pod to a node with label 'env=prod'Node Affinity: Imagine you have a different set of Nodes in your Kubernetes cluster along with a different set of Pods. The Nodes have been labeled with
size=small,size=mediumandsize=largeindicating under what category of size a particular Node fits in. What if you'd like to schedule your Pod on eithersize=mediumorsize=largeNode only? Observe that your complexity to schedule a Pod on Node has increased here. You are providing multiple choices for a Pod to be scheduled on. Can you do it using Taints and Tolerations? Think of it. You can't. That's where for such complex cases, Node Affinity is used. It provides a more expressive way to specify node selection criteria. You can define rules using various operators (e.g,In,NotIn,Exists,DoesNotExist) to express more complex conditions.Node affinity is conceptually similar to
nodeSelector, allowing you to constrain which nodes your Pod can be scheduled on based on node labels. There are two types of node affinity:requiredDuringSchedulingIgnoredDuringExecution: The scheduler can't schedule the Pod unless the rule is met. This functions likenodeSelector, but with a more expressive syntax.preferredDuringSchedulingIgnoredDuringExecution: The scheduler tries to find a node that meets the rule. If a matching node is not available, the scheduler still schedules the Pod on some other Node.
Let's take a look on how are you going to perform this:
Label your nodes using the command
kubectl label node <node-name> <label>
Here, the
node01has been labeled withtype=worker.Now create a Pod definition file that uses
nodeAffinityinternally and schedule the Pod on node01.apiVersion: v1 kind: Pod metadata: name: my-pod spec: containers: - name: nginx-container image: nginx affinity: nodeAffinity: requiredDuringSchedulingIgnoredDuringExecution: nodeSelectorTerms: - matchExpressions: - key: type operator: In values: - workerThis will schedule the
my-podon the the node that contains the labeltype=worker. Imagine you have a set of nodes that have the label astype=workerandtype=laser. If you'd like to schedule your Pod on either of those nodes, that have those labels you can just add more entries forvaluesin your Pod spec and can use a variety of other operators. To read more about different kinds of operators, read the Kubernetes documentation.Finally, the Pod is running on the
node01
Now that you've read up to here, think of answering this question:
Imagine there are 5 different Nodes and 5 different Pods. How would you make sure that the first Pod (Pod-01) gets scheduled on node01, the second Pod (Pod-02) gets scheduled on node02, and so on?
That's it for this Blog. if you like reading this here, do give it a like. You can get connected with me on Twitter or LinkedIn.